
AWS CloudTrail is a service that enables monitoring and recording of account activities. In this post, we will use CloudTrail to monitor CPU usage and to monitor our nodes. We will use Ansible to automate the setup process and as a means to document our setup (IaC). This post assumes you already have Ansible set up for your project and will not provide setup instructions.
To start, we need to configure a Simple Notification Service
(SNS) since we want to receive alarms for
specific conditions: when
CPU usage average is greater than a certain % for X minutes or
when a cluster's node count drops below X amount. SNS is an AWS
service that allows sending notifications through various channels such
as SMS, email, HTTPS, AWS Lambda, and more.
Using the AWS console, let’s set up an SNS alarm action. First, let’s
create a topic. A topic manages the delivery of messages to subscribing
endpoints or clients. In this case from our cluster to us (the client)
via email. In the AWS console, go to SNS > Topics > Create topic.
For my topic, I toggled the Type to Standard and gave the topic a
descriptive name MyApplication_Name_Errors_CloudWatch_Alarms_Topic.
There are several other setup options:
Encryption, Access policy, Tags, etc. but I disregarded them since
they are optional. Once done, click the Create topic button.
Once the topic is created, you need to choose or create a Subscription, which determines how you will be notified (e.g., email, SMS, AWS Lambda). In the SNS Console, go to Subscriptions and click Create subscription. Select the Topic ARN you just created as the Topic ARN for the subscription. Choose your preferred Protocol, Email in this case. Additional features are optional. Click the Create subscription button.
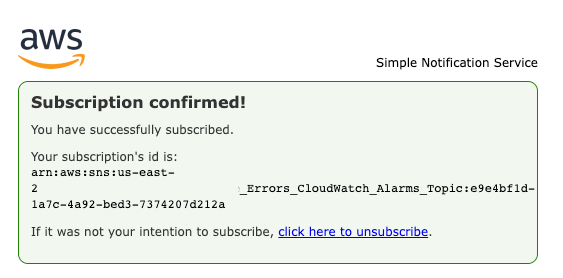
You should receive a notification via your selected protocol. If you chose email, check your inbox for the AWS email and confirm it. Store the subscription ID provided in the confirmation process as you will need it later. Now, let's switch over to Ansible.
In Ansible, create a playbook - my playbook is named
"cloudwatch-metrics.yml". The playbook consists of three tasks:
creating a CloudWatch namespace, adding a CloudWatch Metrics Helm chart,
and creating the alarms. Let's examine each task in detail.
Task 1
- name: Create Amazon CloudWatch Metrics namespace
  tags: cloudwatch
  community.kubernetes.k8s:
    context: "{{ k8s_context|mandatory }}"
    kubeconfig: "{{ k8s_kubeconfig }}"
    name: amazon-cloudwatch
    api_version: v1
    kind: Namespace
    state: present
First we create a namespace, named “amazon-cloudwatch”. Important points to note:
- The tag
cloudwatchis used to differentiate the three tasks in the playbook. - The namespace is named
amazon-cloudwatch. - The
contextandkubeconfigoptions are used to authenticate with the Kubernetes API server; customize them for your use case as needed.
Task 2
- name: Add AWS CloudWatch Metrics helm chart (monitoring)
  tags: cloudwatch
  community.kubernetes.helm:
    context: "{{ k8s_context|mandatory }}"
    kubeconfig: "{{ k8s_kubeconfig }}"
    chart_repo_url: "https://aws.github.io/eks-charts"
    chart_ref: aws-cloudwatch-metrics
    chart_version: "0.0.9"
    release_name: aws-cloudwatch-metrics
    release_namespace: amazon-cloudwatch
    release_values:
      clusterName: ronard-cluster
    wait: yes
Then, we install the aws-cloudwatch-metrics chart using helm. Key points to note:
- Specify the
repo_url,chart_ref, andchart_version. - The
release_namespacematches the namespace created in Task 1. clusterNameis the name of the K8s cluster to monitor.
Task 3
- name: Create alarms
  tags: cloudwatch
  amazon.aws.cloudwatch_metric_alarm:
    state: present
    region: us-east-1
    name: "{{ item.name }}"
    description: "{{ item.description }}"
    metric: "{{ item.metric }}"
    namespace: "ContainerInsights"
    dimensions:
      ClusterName: ronard-cluster
     statistic: Average
     comparison: "{{ item.comparison }}"
     threshold: "{{ item.threshold }}"
     period: "{{ item.period }}"
     evaluation_periods: "{{ item.evaluation_periods }}"
     alarm_actions:
- arn:aws:sns:us-east-1:0000fake_nums0000:MyApplication_Name_Errors_CloudWatch_Alarms_Topic
   loop:
     - name: node-cpu-high
       description: This will alarm when an instance's CPU usage average is greater than 50% for 15 minutes.
       metric: node_cpu_utilization
       comparison: GreaterThanOrEqualToThreshold
       threshold: 50
       period: 300
       evaluation_periods: 3
     - name: node-count-low
       description: This will alarm when a cluster's node count drops below 2 for 15 minutes.
       metric: cluster_node_count
       comparison: LessThanThreshold
       threshold: 2
       period: 300
       evaluation_periods: 3
This task sets up the alarms that will notify us based on the conditions we define. Important points to note:
- The loop is used to set up multiple alarms with different configurations using item variables.
- The
alarm_actionsfield should be updated with the alarm action value obtained earlier.
The entire Ansible file looks something like this. For more information about AWS Cloud Watch Metrics, refer to the documentation:
Before running the playbook, make sure the required collection is installed. To check if it's installed, run the following command:
ansible-galaxy collection list
If the collection is not installed, install the collection by running the following command:
ansible-galaxy collection install amazon.aws
Refer to the
documentation
for more information. To run the playbook, execute the following
command. Note: This will only run the tasks tagged with
cloudwatch:
ansible-playbook cloudwatch-metrics.yml -t cloudwatch
Once the playbook completes, your metrics should start flowing into CloudWatch.
There are two ways to test that your metrics are being sent to CloudWatch. If you are using Kubernetes, you can verify that your namespace was created and that the pods are running successfully. Alternatively, you can wait for some time and check the metrics in the CloudWatch console. The metrics will appear under Event History in the AWS CloudWatch console.
Happy coding!